Top Custom Tactics for 4-2-1-3 After the Latest Patch in FC 25
With the latest patch in FC 25, adjusting your tactics is key to maintaining dominance on the field, especially with the 4-2-1-3 formation. This setup provides a perfect blend of solid defense and attacking power, with the ability to control possession while applying pressure on your opponent. Below, I’ll break down the best custom tactics for the 4-2-1-3 after the patch, offering detailed instructions for the build-up play, defensive approach, and player roles.
1. Build-Up Play: Short Passing
One of the most significant aspects of the updated tactics for the 4-2-1-3 is the Build-Up Play. The "Short Passing" style has been fine-tuned in this latest patch to offer more fluidity and control when progressing the ball from defense to attack. Short passing works particularly well in this formation because it emphasizes maintaining possession, making short, precise passes that allow you to control the tempo and switch between different attacking lanes. This approach helps you avoid losing possession cheaply, a crucial factor in a formation with a lot of attacking potential.
You could also experiment with the Balanced option for Build-Up Play, but Short Passing has proven to be more effective in keeping the ball under control while advancing. The more methodical approach will allow you to wear down your opponent’s defense, drawing them out of position and creating spaces for your forwards to exploit. Whether you prefer slow, patient build-ups or a more direct route, the short passing option ensures that you retain possession while looking for openings.
2. Defensive Approach: High 70 or Balanced
The Defensive Approach setting in FC 25 plays a pivotal role in how your team behaves off the ball. In this case, setting the defensive line to *High 70* is highly effective if you want to apply pressure on your opponent and win the ball back high up the pitch. With the pressing capabilities in FC 25 after the patch, this setup enables your team to press effectively while leaving minimal space between the defense and midfield.
A High 70 defensive line creates an aggressive press, forcing the opposition to play under pressure. This tactic is especially effective if you're up against teams that prefer possession-based play. It allows your team to disrupt their rhythm, win the ball back quickly, and transition into attack with speed.
If you’re not comfortable playing a high press or prefer a more balanced and conservative defensive setup, you can opt for *Balanced* instead. This setting gives your defenders a little more space to react to through balls and long passes while still maintaining solid defensive positioning. The flexibility of this approach ensures you can switch between aggressive and passive defending depending on your opponent's playing style.
3. Player Roles and Instructions
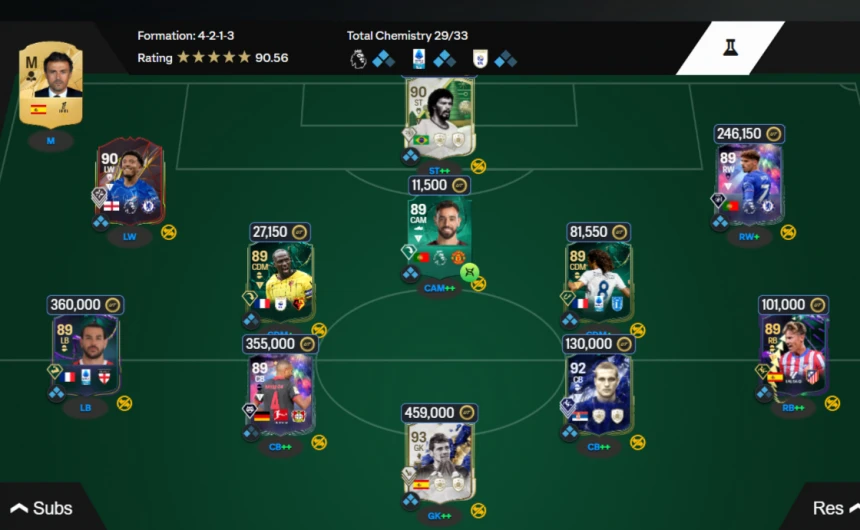
Now, let’s dive into the player roles. Adjusting each player’s specific role within the 4-2-1-3 formation is crucial for achieving the perfect balance between attack and defense. Below are the ideal instructions for each position:
LW (Left Wing): Inside Forward & Roaming
For the *Left Wing (LW), you should set the player as an **Inside Forward* with the *Roaming* option enabled. This tactic allows your left winger to cut inside from the wide position and create goal-scoring opportunities. The *Inside Forward* instruction encourages the winger to drift inside, offering support to the striker while also opening space for the fullback to overlap.
Setting the winger to *Roaming* helps them move around the pitch and find dangerous positions, whether in the central attacking areas or in the half-spaces between the defense and midfield. This versatility makes the winger more unpredictable, allowing them to exploit any gaps in the opponent’s defensive setup.
ST (Striker): Advanced Forward
The *Striker* should be set as an *Advanced Forward. This instruction pushes the striker to be more proactive in attacking, constantly looking to get behind the opponent's defense and make runs into dangerous areas. The **Advanced Forward* setting ensures that the striker acts as a focal point for your attack, making dynamic runs and stretching the opposition’s backline. With this approach, the striker can also create space for your wingers to cut inside and join the attack.
RW (Right Wing): Inside Forward & Roaming
Similar to the left winger, the *Right Wing (RW)* should be set as an *Inside Forward* with *Roaming* enabled. This ensures that the winger cuts inside to offer support in central areas, providing the team with attacking width while also being an option for quick combinations. The *Roaming* instruction gives the winger freedom to exploit spaces and be more unpredictable in their positioning, making it harder for defenders to mark them.
CAM (Central Attacking Midfielder): Shadow Striker & Attack
For the *Central Attacking Midfielder (CAM), set them as a **Shadow Striker* with the *Attack* instruction. This setup allows the CAM to make late runs into the box, supporting the striker and providing an additional goal-scoring threat. By adopting the *Shadow Striker* role, the CAM will act less as a traditional playmaker and more as an auxiliary attacker, looking for space behind the defense.
The *Attack* instruction enhances this role by pushing the CAM forward to support the attack, creating overloads in central areas, and capitalizing on crosses or through balls.
CDM (Central Defensive Midfielders):- First CDM: Holding & Ball Winning
One of the CDMs should be set to *Holding* with the *Ball Winning* instruction. This player’s job is to sit deep and protect the backline. By choosing *Ball Winning*, the CDM will aggressively look to win possession and break up opposition attacks. This is essential for disrupting the opponent’s play and regaining control of the ball.
Second CDM*: Deep-Lying Playmaker & Roaming
The other CDM should be set to a *Deep-Lying Playmaker* with *Roaming. This setup will allow the player to orchestrate the play from deep, linking the defense and attack. The **Roaming* instruction provides more freedom, allowing this player to move across the pitch, provide passing options, and cover for teammates when needed. This player will be essential for maintaining possession and controlling the tempo of the game.
Fullbacks (LB & RB): Fullback & Defend
Both the *Left Back (LB)* and *Right Back (RB)* should be set as *Fullback* with the *Defend* instruction. This ensures that the fullbacks remain solid defensively, providing coverage and preventing the opposition from exploiting wide spaces. By setting them to *Defend*, you make sure they stay focused on their defensive duties, preventing counter-attacks and providing support to the center-backs when necessary.
Center Backs (CBs): Defender & Defend
Both *Center Backs (CBs)* should be set to *Defender* and *Defend. This is the most traditional defensive setting, ensuring that the center-backs focus solely on defending their area, intercepting passes, and clearing the ball when needed. With the **Defender* and *Defend* instructions, the center-backs won’t venture too far forward, staying disciplined in their positioning and dealing with any aerial threats or through balls from the opposition.
Goalkeeper (GK): Goalkeeper & Defend
The *Goalkeeper (GK)* should be set to *Goalkeeper* and *Defend*. This is the default instruction, ensuring that the goalkeeper focuses on shot-stopping and staying in position to cover their goal. It’s important to keep the goalkeeper’s role simple and reliable, especially in formations where possession and team balance are prioritized over aggressive goalkeeping styles like sweeper-keeper.
Final Thoughts
The 4-2-1-3 formation with these custom tactics is incredibly balanced, offering a mix of defensive stability, offensive fluidity, and strategic player roles. With the right tweaks to your build-up play, defensive approach, and player instructions, you can create a system that works effectively against most opponents in FC 25. The key is understanding how the formation functions as a whole and adapting your tactics based on the flow of the match.
Try these adjustments in your next few games, and you’ll notice how much more control you have over the game, with fluid attacking movements, solid defense, and a creative midfield that links everything together. Keep experimenting with player roles and instructions to fine-tune your tactics further and find the best fit for your style of play.
We will share more updates on FC 25 in separate articles. If you found this information helpful or would like to learn more, please explore the other articles on our site.
Top FC 25 Mechanics You Should Master After the Latest Patch


